Editor’s Note: This is mirrored from Fritz.ai.
If you’ve ever considered working with the new Core ML framework in iOS, you might have seen a demo video like this:
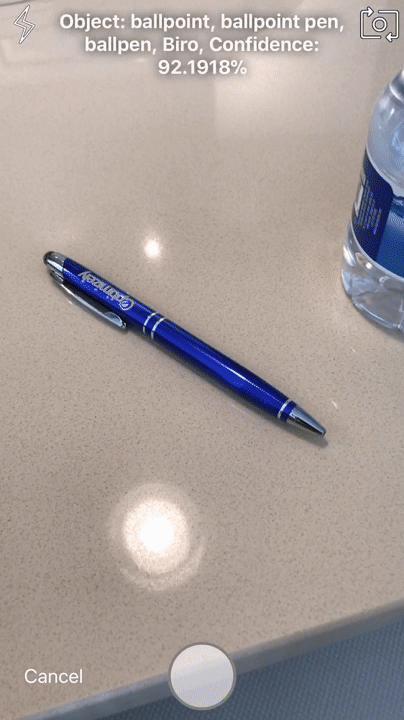 I'm 85.6701% confident that you've seen this before.
On the surface, this might not look as exciting as it truly is - perhaps because these are popping up everywhere, as this is a very popular experiment with the technology. Each example is usually about 3 or 4 classes, with 50–100 lines of code each. What if I told you that you can get this exact same code sample working with one line of code? Thanks to my library, Lumina, you can:
camera.streamingModelTypes = [MobileNet()]
No manual image resizing. No model validation. No multithreading with Grand Central Dispatch. Just you and your machine learning model. Let’s take a dive into how this works and how you can use it for any image classification model you have for Core ML.
Using Core ML Raw
Let’s say you need to make an iOS app that predicts what’s in a photo. You do some googling, and you find out that you need to download a Core ML model and process the image through it. One approach you could take would be to modify an incoming CVPixelBuffer like so:
func resize(pixelBuffer: CVPixelBuffer) -> CVPixelBuffer? {
  let imageSize = 299
  var ciImage = CIImage(cvPixelBuffer: pixelBuffer, options: nil)
  let transform = CGAffineTransform(scaleX: CGFloat(imageSide) / CGFloat(CVPixelBufferGetWidth(pixelBuffer)), y: CGFloat(imageSide) / CGFloat(CVPixelBufferGetHeight(pixelBuffer)))
  ciImage = ciImage.transformed(by: transform).cropped(to: CGRect(x: 0, y: 0, width: imageSide, height: imageSide))
  let ciContext = CIContext()
  var resizeBuffer: CVPixelBuffer?
  CVPixelBufferCreate(kCFAllocatorDefault, imageSide, imageSide, CVPixelBufferGetPixelFormatType(pixelBuffer), nil, &resizeBuffer)
  ciContext.render(ciImage, to: resizeBuffer!)
  return resizeBuffer
}
After you get your buffer resized, you then pass it through your model, and you do what you want with your predictions:
DispatchQueue.global(qos: .userInteractive).async {
  if let pixelBuffer = self.convert(image) {
    guard let prediction = try? self.model.prediction(image: pixelBuffer) else {
    return
  }
  DispatchQueue.main.async {
    screen.updatePredictionLabel(prediction)
  }
 }
}
Not bad, right? In just a short amount of code, you take an image and leverage the GPU of an Apple device with native iOS code to predict the contents of that image. This is great! However, this is also exactly why I made Lumina the way it is. Let’s look again at the singular line of code you need to enable Core ML with Lumina:
camera.streamingModelTypes = [MobileNet()]
It’s not that it was difficult before - rather, I saw an opportunity to make it easier, so I took a shot at it. Let’s start at the beginning by deriving an interface.
The Interface
When you design an application programming interface (API), it’s good practice to think in human terms about what you’re trying to accomplish. The goal of Lumina is to make using a camera in iOS as stress-free as possible. Thanks to iOS 11, the use of the camera includes using Core ML as well.
When designing this interface, I thought - how simple can I make this? In the sample app that comes with Lumina, I provide a file called MobileNet.mlmodel, which can be downloaded from Apple’s website here - we’ll refer to this model often.
Test Driven Development is a very widely discussed practice in software, but one basic tenet of the practice is to write your tests first, and then write code that makes your tests pass. Keeping this in mind, I decided to write the interface, and then write code to make the interface valid. I arrived at the snippet above that this article is based on, where you assign a collection of instantiated Core ML classes to camera.streamingModelTypes.
To utilize a Core ML model, Vision needs to access the property named model like so:
let model = MobileNet().model
Core ML is not compatible with iOS 10 or below. However, because I want Lumina to be accessible to a wider array of developers, and I like a little bit of masochism, I wanted to maintain one code base that works for developers with and without access to Core ML. This meant that I had to store my models in a more generic variable container:
open var streamingModelTypes: [AnyObject]?
My favorite video game of all time is Metal Gear Solid, and this image is appropriate:
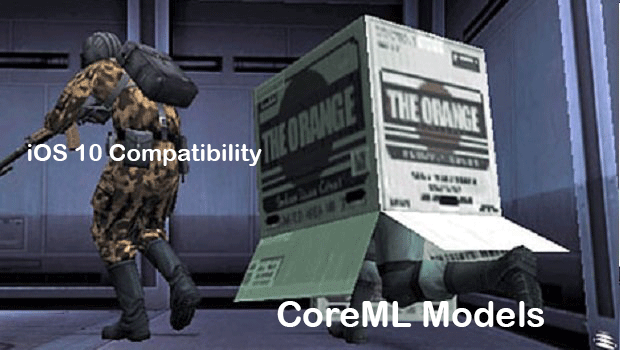 Nothing to see here, LLVM, move right along.
It would have been a lot easier to make developers wrap all of their code in if #available (iOS 11.0, *) statements just to use my framework, but that wouldn’t be any fun, would it? Upon some reflection, I realized that I could work around this by using the Mirror class in Swift, like so:
for type in types {
  let reflection = Mirror(reflecting: type)
  for (name, value) in reflection.children where name == "model" {
    guard let model = value as? MLModel else {
      continue
    }
    modelsToSet.append((model, reflection.subjectType))
  }
}
If you make a reflection of your object using Mirror, then you can loop through each property and match against the one you’re looking for. In this case, you’re looking for the model property, and if you can cast it to an object of type MLModel, then you’re in luck. I use the reflection.subjectType to keep track of which model is which.
I wanted developers to only have to write one line of code to enable Core ML with Lumina, and thanks to Mirror, I was able to do that and maintain source compatibility with iOS 10. After some more handiwork, I pass these models down to the recognizer, and the real magic begins.
The Machine Learning
In Swift, it’s possible to use Core ML without the Vision framework, but to properly perform predictions with image classification models, you have to work to get the query image to the type of CVPixelBuffer and the right dimensions. Thankfully, Vision makes predictions a lot easier from images, and does the heavy image manipulation work for me, so I can just give it a CoreGraphics image, and get what I need back!
First, I create a struct for my result type called LuminaPrediction, so I can keep my framework iOS 10 compatible:
public struct LuminaPrediction {
  public var name: String
  public var confidence: Float
}
Next, I create a buffer collection for my results, and a DispatchGroup to act as a semaphore like so:
var recognitionResults = [([LuminaPrediction]?, Any.Type)]()
let recognitionGroup = DispatchGroup()
Now that I have a collection of models, even typed as Core ML objects, and their associated model names, I can create a request using VNCoreMLRequest for each model I have like so:
guard let visionModel = try? VNCore MLModel(for: modelPair.0) else {
  recognitionGroup.leave()
  continue
}
let request = VNCore MLRequest(model: visionModel) { request, error in
  if error != nil || request.results == nil {
    recognitionResults.append((nil, modelPair.1))
    recognitionGroup.leave()
  } else if let results = request.results {
    // this function converts my results to my struct
    let mappedResults = self.mapResults(results)
    recognitionResults.append((mappedResults, modelPair.1))
    recognitionGroup.leave()
  }
}
Once this request is performed, if you don’t have an error, then mapResults takes your predictions, which are currently of type VNClassificationObservation, and converts them to a collection of my iOS 10 compatible struct:
private func mapResults(_ objects: [Any]) -> [LuminaPrediction] {
  var results = [LuminaPrediction]()
  for object in objects {
    if let object = object as? VNClassificationObservation {
      results.append(LuminaPrediction(name: object.identifier, confidence: object.confidence))
    }
  }
  return results.sorted(by: { $0.confidence > $1.confidence })
}
With each request set up like this, I have to set up a handler with my query image to perform each request:
guard let coreImage = image.cgImage else {
  recognitionGroup.leave()
  continue
}
let handler = VNImageRequestHandler(cgImage: coreImage)
do {
  try handler.perform([request])
} catch {
  recognitionGroup.leave()
}
The DispatchGroup I created will then notify the main thread to fire off once I’m done, sending a completion handler containing my results:
recognitionGroup.notify(queue: DispatchQueue.main) {
  completion(recognitionResults)
}
Whew! A lot of work to do, but thanks to Vision and Core ML, I was able to hand an image off to iOS, and the GPU gives me back a stream of predictions for each frame my camera processes. The delegate function that ultimately returns the predictions out of the framework looks like so:
func streamed(videoFrame: UIImage, with predictions: [([LuminaPrediction]?, Any.Type)]?, from controller: LuminaViewController) {
  // handle your results here
}
The End Result
Thanks to Lumina, you can point your device at any object, and your result in real time should look something like this:
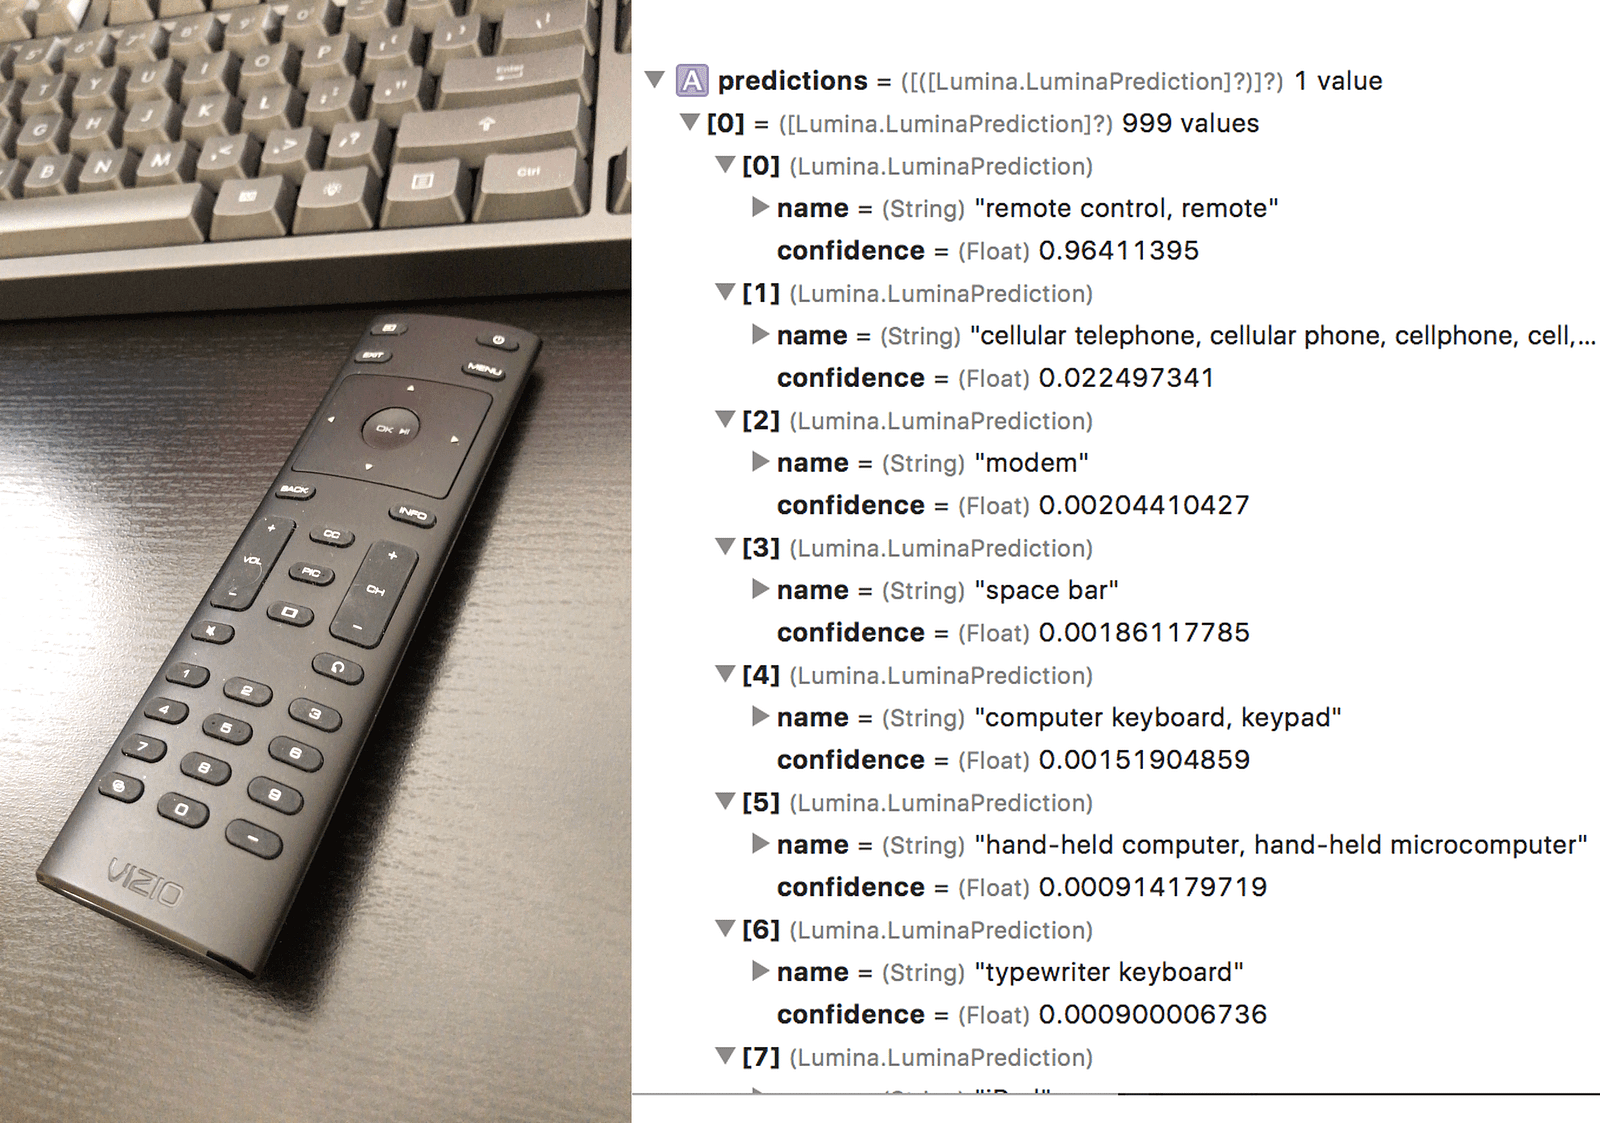 On the right side, Xcode tells you an ordered list of each prediction made by the model. The query image is on the left. On an iPhone 7+ this prediction takes ~0.1 seconds.
One line of code goes a long way, doesn’t it?
Lumina is still under active development on GitHub, and as the capabilities of Core ML expand throughout iOS, I’d love to make sure Lumina remains the fastest way to utilize image classification with Core ML.
I wrote a separate blog post about the capabilities of Lumina on my own website, so feel free to give it a read, and more importantly, give Lumina a try! Follow me on Twitter to see what I’m up to next!
NB: Thank you to Nathan Gitter, Canberk Özçelik, and Raymond Camden for their help editing this article!